TCC Web Application: User Guide
Introduction
The TCC configuration tool is used to create a TCC configuration store for use in VOLTTRON. The configuration store content being created will be shown in the viewing pane on the right side of the application.
TCC Application Configuration
The TCC application behavior is controlled through these configuration Pages:
- The Campus Configuration page
- The Device/Criteria configuration page
- The Agent Configuration page
- The Inputs page
- The Outputs page
- The Schedule page
Importing the Master Driver Configuration Store
At the initial homepage, the user will be prompted to upload the Master Driver Configuration Store file. Values within the Master Driver Configuration Store will be parsed to provide options for Campus, Building, Devices, Topics, and Points throughout the application.

Once the user has selected the Master Driver Configuration Store, this homepage will not appear again. However, if the user needs to upload a different Master Driver Configuration Store at any point, this option can be accessed via the Menu icon in the top left of the application.
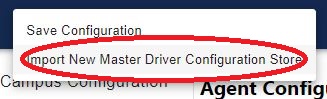
If a new file needs to be uploaded to the application, in the top left corner of the screen there will be a hamburger dropdown icon.

Once this item is selected, there will be two options to choose from.
Warning
Uploading a new Master Driver Configuration Store will remove all current data in the application.
Campus Configuration
When a Master file has been uploaded, the application will go into the Campus Configuration page. The first selections that will be shown are the Campus, Building, and Time Zone dropdowns.


Campus
The campus name as published by the VOLTTRON platform.driver service.
Building
The building name as published by the VOLTTRON platform.driver service.
Time Zone
Time Zone has default options implemented into the program.
Device Configuration
Device Configuration is the second page in the list of configuration pages. Once this page is selected, there will be a list dropdowns shown in the center.

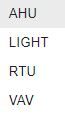
There are 4 different selections with device. When the device drop down is selected, these 4 items will be shown:
After a Device is chosen, there is an option below it to choose the model type. The two options will be First Order Zone and Simple. Once an option of these are chosen, the option will be stored inside of the JSON code.

The last value(s) will be determined based upon the device chosen. This list will go over each of the different options the device configurations will go over.
AHU
When AHU is selected, new items will appear. These will be Equipment Configuration and Model Configuration.

Equipment Configuration:
Configuration of the AHU starts with the Equipment Configuration.

Note
Each of these check boxes are stored as boolean values. If checked, it will be stored as “True”. if unchecked, it will be stored as “false”.
Has an Economizer:
Input is a checkbox inside Equipment Configuration.

Building Chiller
Input is a checkbox inside Equipment Configuration.

Variable Volume
Input is a checkbox inside Equipment configuration.

Economizer Limit
Item takes in a floating point precision based value.

Supply Air Set Point
Item takes in a floating point precision based value.

Nominal Zone Set Point
Item takes in a floating point precision based value.

Model Configuration
Model Configuration is another option that will be available upon selection of the AHU Device. Inside of Model Configuration there are a selection of inputs to use. cpAir, COP, mDotAir, c0, c1, c2, and c3.
cpAir
Item takes in a floating point precision based value.

COP
Item takes in a floating point precision based value.

mDotAir
Item takes in a floating point precision based value.

c0
Item takes in a floating point precision based value.

c1
Item takes in a floating point precision based value.

c2
Item takes in a floating point precision based value.

c2
Item takes in a floating point precision based value.
c3
Item takes in a floating point precision based value.

End AHU
Light
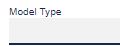
Light is the second selection of the device list inside of Device Configuration. Light consists of Model Type and Rated Power.

Model Type
Drop down that consists of two items: Simple and Simple Profile*
Rated Power
Item takes in a floating point precision based value.

Light Hourly Parameters File Upload
Light Hourly Parameters File Upload will allow a file to be uploaded into.

Warning
Light Hourly Parameters File Upload will only read .json or .csv files.
Once a file is uploaded, the results will be displayed in the json code on the right side of the screen.
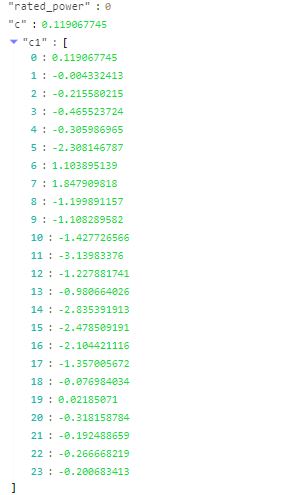
Note
The example used displays the results of a .json file.
The items within the file uploaded will be placed in their corresponding areas inside of the json code on the right.
End Light
RTU
RTU is the third selection of the device list inside of Device Configuration. Once RTU is selected, there will be a new selection of items to insert info.
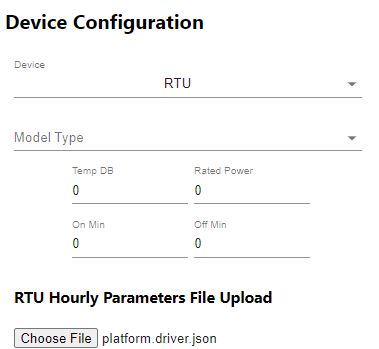
Temp DB
Item takes in a floating point precision based value.

Rated Power
Item takes in a floating point precision based value.

On Min
Item takes in a floating point precision based value.

Off Min
Item takes in a floating point precision based value.

RTU Hourly Parameters File Upload
RTU Hourly Parameters File Upload will allow a file to be uploaded into.
Warning
RTU Hourly Parameters File Upload will only read .json or .csv files.
Once a file is uploaded, the results will be displayed in the json code on the right side of the screen.
Note
The example used displays the results of a .json file.
The items within the file uploaded will be placed in their corresponding areas inside of the json code on the right.
End RTU
VAV
VAV is the last item on the device list inside of Device Configuration. When VAV is selected, there will be a new selection of items to insert info.

Model Type
Drop down that consists of two items: Simple and Simple Profile*
VAV Hourly Parameters File Upload
VAV Hourly Parameters File Upload will allow a file to be uploaded into.
Warning
VAV Hourly Parameters File Upload will only read .json or .csv files.
Once a file is uploaded, the results will be displayed in the json code on the right side of the screen.
Note
The example used displays the results of a .json file.
The items within the file uploaded will be placed in their corresponding areas inside of the json code on the right.
Agent Configuration
Agent Configuration is the third page in the TCC config tool.
Within Agent Configuration, the first prompt will be to add an Agent Name.
the second prompt within Agent Configuration will be device. This will include a dropdown list of items: AHU, Light, RTU, and VAV.
After selecting an item in devices, there will be different input options depending on what is selected.
AHU

When AHU is selected in Agent Configuration there will be 2 new options to input into.
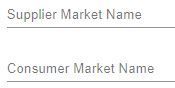
Supplier Market Name
Item that takes in a name of a Supplier Market

Consumer Market Name
Item that takes in a name of a Consumer Market.

End of AHU agent
Light

Light will be the second item in the dropdown.
Enable Actuation On Start.
Input is a checkbox inside Light

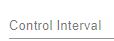
Control Interval
Item takes in a floating point precision based value.
Market Name
Item that takes in a name of a Market

RTU

RTU is the third item in the dropdown selection list. This item, once selected, will place 2 checkboxes below the list. The two checkboxes are Enable Actuation On Start and TNS.
Enable Actuation On
Input is a checkbox inside RTU .. image:: _images/enable_Actuationrtu.JPG
TNS
Input is a checkbox inside RTU

Control Interval
This item takes in a floating point precision value.

VAV

VAV is the last item on the list in Devices for the Agent Configuration page.
Enable Actuation On Start
Input is a checkbox inside VAV .. image:: _images/enable_Actuationrtu.JPG
Control Interval
This item takes in a floating point precision value.
Market Name
Item that takes in a name of a Market
Actuation Method
Drop down that consists of two items: Periodic and Market Clear

Inputs
Inputs is the fourth page in the TCC application. Inside of the Inputs page the first thing is that, automatically, the first input there is is named Input 0. There is also the option to remove or reset this input as well.

Add Input
The Add Input button is an item that allows the user to add another Input to the page. Each Input is named by default. The first Input will automatically be named Input 0. The next: Input 1.. etc.

Remove In the top right of the Inputs page, there is a red button called remove. This will remove the selected input that you want to remove.

Topic
The first input field you will see in the Inputs page is Topic.
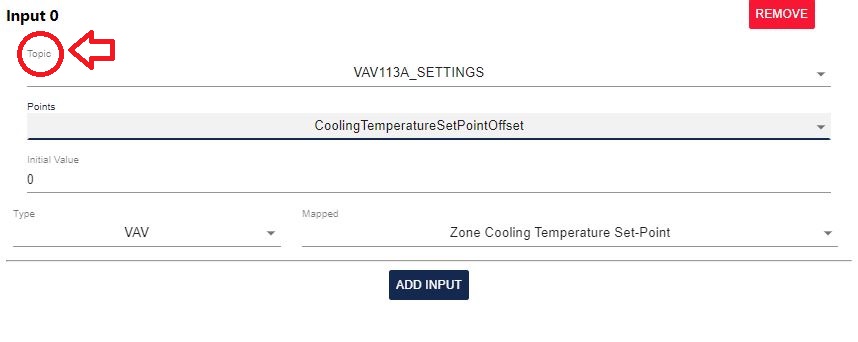
inside of Topic there is a dropdown list. The dropdown list will be determined based upon the Main Configuration File. Once an option is chosen, different Points in the Points input field will be available based upon the Topic chosen.
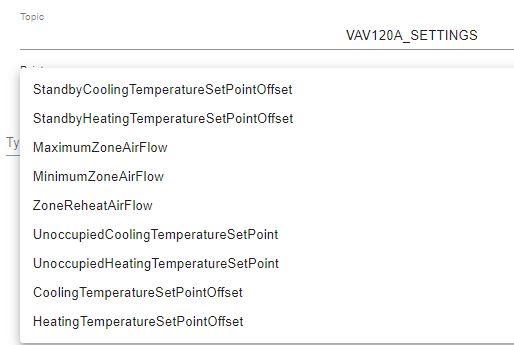
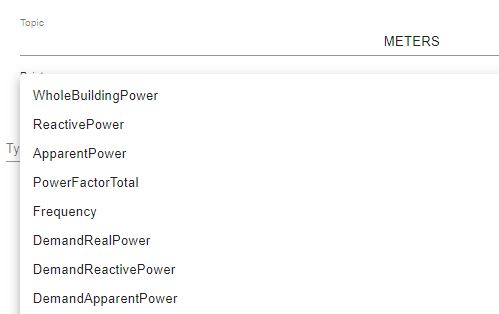
Point
Points change based on the topic that is selected. The points that will be displayed are the ones that are stored within that device’s data structure that is passed in the platform.driver.store file.
In the first example the topic will be: VAV213C_SETTINGS

The second example the topic will be: METERS

Initial Value
This input field will take in a floating point precision number as a value.

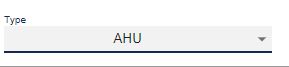
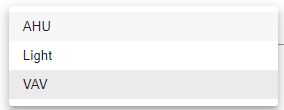
Type
Type has a drop down of AHU, Light, and VAV.
Mapped
Once Type is selected, mapped will be an available drop down.


End of Inputs
Outputs
The Outputs page is the fifth page in the TCC application. Inside of the Outputs page the first thing is that, automatically, the first item there is is named Output 0. There is also the option to remove or reset this input as well.
In the top right of the Outputs page, there is a red button called remove. This will remove the selected input that you want to remove.
Add Input
The Add Input button is an item that allows the user to add another Input to the page. Each Input is named by default. The first Input will automatically be named Input 0. The next: Input 1.. etc.
Remove
In the top right of the Outputs page, there is a red button called remove. This will remove the selected input that you want to remove.
Topic
The first input field you will see in the Outputs page is Topic.
inside of Topic there is a dropdown list. The dropdown list will be determined based upon the Main Configuration File. Once an option is chosen, different Points in the Points input field will be available based upon the Topic chosen.
Point
Points change based on the topic that is selected. The points that will be displayed are the ones that are stored within that device’s data structure that is passed in the platform.driver.store file.
Example: Topic is set to VAV120A_SETTINGS
Example: Topic is set to METERS
Type

Depending on the chosen type (AHU, Light, and VAV), the Mapped dropdown will defer.
Mapped
Once Type is selected, mapped will be an available drop down.
Flexibility Range (High)
This item takes in a floating point precision value.

Flexibility Range (Low)
This item takes in a floating point precision value.
Control Flexibility (High)
This item takes in a floating point precision value.
Control Flexibility (Low)
This item takes in a floating point precision value.
Fallback
This item takes in a floating point precision value.

Off Set Point
This item takes in a floating point precision value.

Offset
This item takes in a floating point precision value.
Output Configuration
Below the Type option there are various different input fields to configure.

Each input field takes in a floating point precision value.
Actuator
Actuator is displayed below the Output configuration input fields. This field is disabled by default.

Below the Actuator, there is a dropdown to chose from. The dropdown will give a list between default and None.
Schedule
Schedule is the last page of the TCC application.

This page has every day of the week listed (mon-sun). on each input field there is a Start time, an Always on button, an Always off button, and an End time.

Clock
When the Start and End input fields are selected, a pop up of a clock will appear to select the correct time needed.

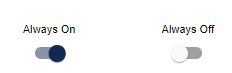
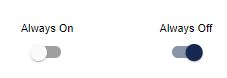
Always Off/On
The buttons for always off and always on determine which days of the week will be Always On or Always Off.
Note
When an icon is selected, and another is selected, the previous icon will return back to its previous state. They can both be off, but both cannot be on.
Settings
Dark Mode : There is an option for this document to be used in Dark mode. Click the Contrast icon on the top right corner of the page to toggle this option.
